Mitsubishi FH140 restoration pt 5


|
|
|
|
|
|
I’d made a grand plan that for this issue that I’d be doing a bit of bragging about how I’d just got the first coat of finish colour on the Mitsubishi.
Well if the saying about the plans of "mice and men" is correct, then I would certainly belong in the former category, rather than the latter.
To recap on the job so far, I’d started from the back of the truck and worked forward, with the idea being to finish the job off by tackling what I figured was a small amount of rust in the cab, although I knew it still would be the biggest part of the entire job.
I had hoped to keep the truck on the road for the majority of the time with the view to doing all the restoration work on weekends and any days I didn’t have any transport work booked in.
Given that the truck isn’t my main source of income, I’m not going to pretend that it has a constant flow of jobs, so it’s obvious that there would also be other days that I could crack on with the restoration as well.
So when it came to removing the wheels for painting and finishing off parts of the underbody that I couldn’t get at with the wheels in place, I wasn’t too worried when it became evident that a few days of downtime would have to be accounted for.
What I hadn’t prepared myself for though, was a nasty little leak that started piddling on my head when I was removing the bumper and grille. On investigation, the source of the wetness was found to be coming from what could best be described as a small manifold in the heater system which consisted of two 45-degree mild steel pipe bends, welded to the housing of the tilt-cab’s fulcrum.
Evidently, the designers at Mitsubishi in the late 1980s (the truck is registered in New Zealand in 1991, so the timeframe is just a guess), were unable to come up with a way to allow the heater hoses to bend without crimping when the cab was tilted forward, so the "manifold" seems to have been added as an afterthought.
I have to say that, to date, I haven’t been able to find anyone who can supply the replacement parts, including formed hoses with the correctly shaped bends.
That means that sometime soon I’m going to have to get creative and manufacture something that will do the job, but as an interim measure I’ve blanked the heater system off to allow me to carry on with the restoration and still be able to drive the truck once I’ve got the mudguards and a few other bits and pieces back in place.
Seeing that I’ve been drawing on the wisdom of age-old sayings this month, I guess I’m drawn to another one about clouds and silver linings.
This unexpected setback has had not just one but two silver linings, in that had I not found the leak when I did it would have eventually reared its head, probably at the most inconvenient of times, most likely in peak-hour traffic or whatever.
Also, the fact that I’ve had to remove a whole lot of heater hoses and accessories has cleared the way for me to gain access to a lot of previously inaccessible areas of the cab that will help me to achieve a higher level of finish to the completed project.
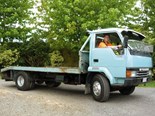
Upon giving the truck the once-over when I first got it home a few months ago, it was apparent that it was going to need a bit of TLC to get it to a presentable condition.
Having said that, at first glance the truck didn’t look too bad, in fact a number of my buddies reckoned that I should just give it a cut and polish and put it to work as-is.
However, even though the Mitsi had had a COF issued on the week I made the purchase, I knew I would never feel comfortable about presenting the truck at the testing station when the next COF came around in six-month’s time.
It’s amazing how quickly six months passes and pretty soon I found myself at VTNZ Avondale for that dreaded COF check.
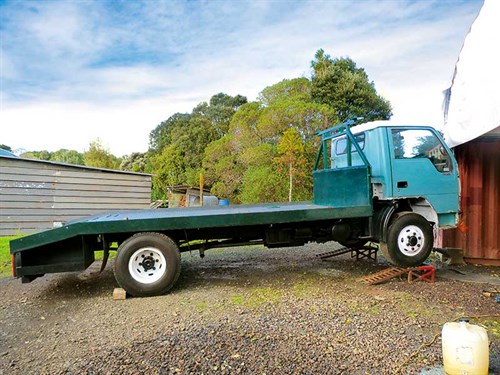
By this time, I’d spent many hours tidying surface rust on and under the deck and giving it a coat of paint, a fact that boded well with the vehicle inspectors, adding bonus points to the pass mark.
One of the inspectors however did notice some rust stains appearing from under the plastic capping on both mudguards and mentioned that I might like to take a look at the cause before I came back for the next inspection at the end of the year.
Given that the cab was the very next item on my restoration agenda, I immediately set to work removing the guards and found that at some stage in the vehicle’s past, somebody had made a half-hearted attempt at repairing the metal piece that the plastic cap was mounted on.
The mountings on both guards were almost completely rotted out, but instead of being peeved at the find I saw the whole affair as a great opportunity to learn some new skills.
I have to say that rebuilding the partially double-skinned mudguards, although being quite a time consuming exercise (about a day spent on each mudguard) it was an extremely rewarding one.
Another interesting discovery I’ve made recently is that it’s much easier to find spare parts for a 1953 Bedford than it is to find parts for a 1991 Mitsubishi, which I guess in a way vindicates the comments of my smart aleck vintage truck mates who have scorned the restoration all along.
Anyway, there we have it, not quite the result I was hoping for this month as I really did think it was possible to have the paint on the cab by now – here’s hoping for a better result in August.
Keep up to date in the industry by signing up to Deals on Wheels' free newsletter or liking us on Facebook.
.jpg)
.JPG)


.jpg)