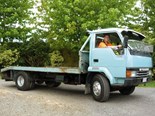
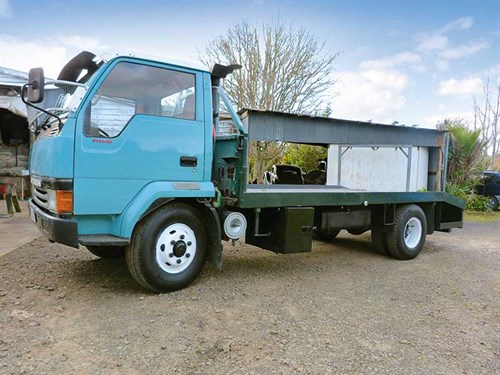
Mitsubishi FH140 restoration pt 4


|
|
|
|
|
|
|
|
I’ve always been eager to share my restoration experiences of the previous month but this time around I was surprised to find myself at a loss as to how I was going to make a story out of my progress over the past four weeks.
By now I’d worked hard enough grinding rusty metal plate and undoing countless nuts and bolts, running them over with the buff and making sure the threads were clean.
In fact, my wife Christine, recently commented that for several weeks I’d been coming home looking like I’d been working in a coal mine.
But in spite of all this I still couldn’t see any progress that was worthy of a tale to tell.
All of those hours spent carrying out the mundane tasks that contribute to the finished product sometimes simply don’t appear all that significant in the overall scheme of things and the bottom line was that, to date, it looked like I hadn’t moved the project very far along at all.
Here I was just a few days away from the magazine’s deadline with nothing to show by way of progress, save a box-full of nice clean nuts and bolts, along with a few other ancillary bits and pieces.
It was looking like I was going to have to get my act together and be pretty damn quick about it – talk about a last-minute rush!
I’d been working my way from the back of the truck to the front with the idea of finishing the job by doing the cab last of all, the theory being that by tidying up the cab before giving it a coat of paint in a totally different colour from its current livery should prove to be its pièce de résistance.
I had been agonising over a choice of painting the truck the same dark green and black as my 1953 K Bedford (although I felt that the colour was a little too old for a truck built in the 1990s) or plain white which was the livery of my trucks in my general cartage days.
So I’ve settled on a compromise which will be a white roof and wheels, black chassis and hubs with a compromise in a slightly more modern shade of green which will be revealed towards the end of the restoration series.
Being fully aware of the fact that I was going to have to go like the clappers to get some progress under my belt, I set to work by removing the wheels – well to be truthful, I called-in Mullins Tyres to carry out this part of the operation.
There were two reasons behind this decision, one of which was of a time-saving nature, the other was the fact that I didn’t have, or at least thought I didn’t have, a wheel brace or sockets big enough to do the job.
However, a quick look in the tool room (after I’d had the wheels removed I might add) revealed the fact that I had a one-inch drive set of sockets on loan from my good friend Dean Southey who played a major role in my two previous restorations.
Furthermore, since that search through the tool shed, I’ve found a further two sets of genuine Mitsubishi wheel braces, one of the sets is in brand-new condition.
I’m still not convinced that I was pleased with the find, as although it did save me the cost of a second visit from the guys at Mullins Tyres, it ended up costing me a great deal of hard Yakka swinging on a bar and socket.
One thing it did though was to remind me of the old days when the only way to get a flat tyre changed on the side of the road was to do it yourself – it got me to thinking that we all may have become a little bit soft in recent times.
Anyway, once the rear wheels were removed. It allowed me to complete the final bit of rust removal under the deck and I can hardly describe the feeling of relief that came over me as I sprayed the last coat of paint on this part of the truck.
I really do enjoy taking a part of a vehicle that looks ugly and making it pretty, however as much as I enjoy the work, this really had been a big job and one that I was glad to see the back of.
Taking my first in-depth look at the wheels which were previously painted bright silver, it was plain to see that they had been sprayed by the previous owner, while still on the truck and looked great from a distance but would never pass muster for any half decent restoration job.
Slow and all as I am on the uptake, it didn’t take me long to figure out that I was in for a long session on the end of a disc grinder in order to get the rims looking good enough to receive a brand-new coat of white paint.
As I’ve said in the three previous instalments, I’ve endeavoured to keep the truck operational for the majority of the time I’ve been carrying out the restoration work, however it’s plain to see that I’ve had to relax my resolve on a number of occasions as it is impossible to remove parts then clean, prime, undercoat, top coat and reassemble the entire kit and caboodle over a weekend.
Having said that, the longest period off the road to date has been four days, so I’m not going to beat myself up too badly over the matter.
The day of the dreaded trip to the testing station finally arrived and it was all over in a matter of half-an-hour, so taking a cue from the age-old saying regarding a picture painting a thousand words I’ll let the photo below tell the remainder of the story…
Tip of the month
Always look in your toolbox before you go out and buy a piece of kit you think you don’t already possess!
Keep up to date in the industry by signing up to Deals on Wheels' free newsletter or liking us on Facebook.

.jpg)


.jpg)

.jpg)