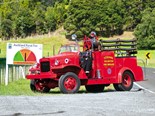
Mitsubishi FH140 restoration pt 6


|
|
|
|
|
|
|
|
I thought I’d come to learn to never be surprised at an outcome, especially where this restoration business is concerned. However I got a huge surprise (a pleasant one in this instance) right slap-bang on the first day of the new month.
Anybody who has been following this story will recall that last month, I’d come across a leak in a sort of manifold that formed a part of the truck’s heater system. I was really concerned that any fix wasn’t going to be a quick one.
I’d checked out a hose supplier to see if the hose they could source would allow us to do away with the manifold, by replacing the entire setup with one length of hose on the supply side and another single piece on the return side.
While all the experts at the hose firm agreed that their hose would be fine when the cab was sitting flat, they felt it would crimp and eventually crack after the cab had been tilted a few times during servicing.
However, on an excursion out to the Mitsubishi agents to buy some other spare parts, I asked if they had anything that looked like the old manifold: no surprises when I got a negative answer.
Well I figured it was worth a shot to ask about the company’s own brand of heater hose. I was intrigued to find that the sample the spare parts guy brought to the counter looked way more flexible than the product the hose company had on offer.
Not entirely convinced it would do the trick, I bought a couple of metres of it to experiment with and, lo-and-behold, it worked like a charm.
So in the end, a job I thought was going to take a day or more to repair was made right in a matter of ten minutes. Well probably a morning, if you take into account I had to travel about forty kilometres to get the hose.
With the heater sorted, I could then turn my attention to removing some door trim, wind lace, floor mats and the seats.
I’ve made the decision not to be too pedantic with the interior of the cab. After all it’s a working truck and will get a bit of wear and tear as soon as it goes back on the road. However it needs a bit of a pretty-up in the paint department to make it look half-tidy.
If you’ve been reading this story from the beginning you’ll want to know what I mean by going ‘back’ on the road; after all, I did say at the start that I’d intended keeping the truck on the road while it was being restored.
Well I’ve got to put my hand up and admit that keeping the truck in action isn’t going to be a reality with the remainder of the restoration. After all it’s impossible to drive the thing without any bloody seats.

It seemed a bit of a shame to spend six months doing up a vehicle and changing its colour scheme but to leave it with tired-looking upholstery, so I just had to take the seats out.
Once removed, I delivered them to my mates at Waikumete Car Upholsterers for a bit of a freshen-up.
I’ve never been keen on red trim of any sort in the first place and, although it was only a light shade, it was looking a bit worn. Plus I reckoned the red would clash with the metallic green the truck’s exterior will be painted in.
To that end, I’ve settled on a charcoal cloth insert which hopefully will wear well and not show up too many marks.
The next step was to remove the mudguards and the plastic step covers.
I wasn’t too delighted to find rusted panel steel underneath when I pulled the guards apart. However, after the best part of a week’s work, I eventually remedied the situation. The process provided plenty of opportunity for me to hone my pattern making, welding and spray-painting skills.
I found in the end that the exercise was well-worth the effort and initial aggravation; I even surprised myself with quality of the finished product.
Heading back into the cab, I got to work with a toothbrush to clean all the nooks and crannies, getting rid of twenty-five years’ worth of dust and grime. It’s amazing to see all the filth that accumulates, even on the wind-lace, over a period of a quarter century.
I spent an entire day on this part of the process and I have to say that it was the most boring job I’ve encountered so far during this restoration. I reckon I disliked this part of the operation even more than getting covered in dust for a week, cleaning the underside of the deck.
A recent rare spell of fantastic weather provided ample opportunity to get stuck into sanding and priming the cab. I was hoping that finally I’d get to the part where I’d be showing-off some photos of a newly painted truck, but the deadline for this month’s issue of Deals On Wheels is once again upon us. Therefore those photos will have to wait until next month’s instalment.
Today, as I’m sending this story off to the Ed, I’m putting the base coat on the cab and hope to clear-coat it tomorrow. You can be assured of seeing some photos of the finished product in next month’s issue – I promise.
Tip of the month
You have to accept that you’re going to make a few mistakes along the way.
Keep up to date in the industry by signing up to Deals on Wheels' free newsletter or liking us on Facebook.

.jpg)


.jpg)


.jpg)