Restoration Project: FGK Morris—Part 36
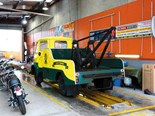
After three years of working on this project, the job is just about completed, save one small issue surrounding passing through the final hoop of getting the VIN process completed
The fact that the manufacturer’s GVM rating of 3680kg places the truck in the ‘heavy’ category, a feature that kicks in at 3.5 tonnes (160kg—I know, stupid isn’t it?), which means the welding that was supervised by a ‘light’ engineer, isn’t worth a tin of baked beans when it comes to getting the truck passed for a COF.
 |
|
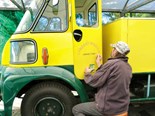
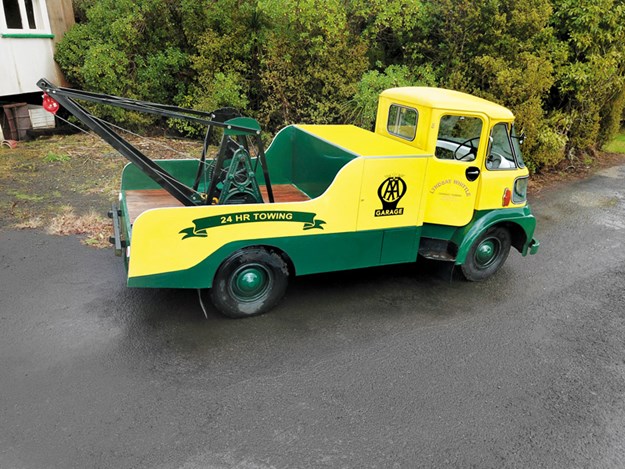
All ready for the certification check
|
While I’ve managed to find a heavy vehicle inspector who’s willing to take the job on, it’s going to be some time until he’ll be able to get stuck into it due to the fact that everybody who’s involved in that industry is run off their feet at the moment.
It would’ve been great to have been able to sign this series off with a truck that was road legal, however, we really need to move on to the next project and park the little FGK in the meantime, given that it could easily be a month or two before the heavy vehicle certifier finds the time to check my project out.
So, with this being the last restoration story for this truck (we’ll round it off with a pictorial in next month’s issue), I thought it’d be interesting to take a trip down memory lane and see what we started with and give a brief rundown of how it all came together over the course of three years
August 2014
 |
|
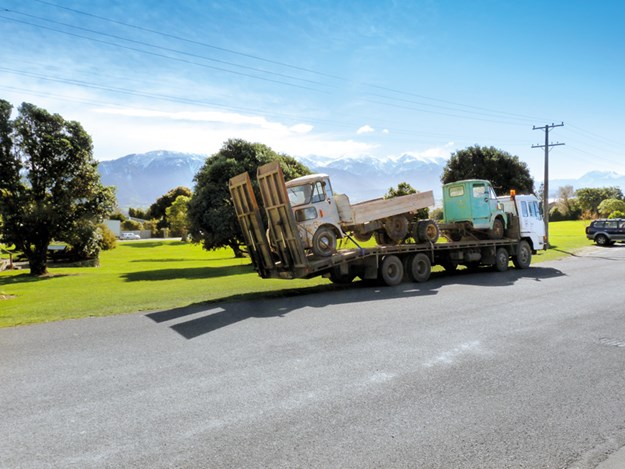
At Kaikoura, Auckland bound
|
Colin Dunn from CRD Automotive in Avondale kindly lends me his eight-wheeler Mitsubishi transporter to go to Albury, south of Ashburton, to collect two trucks: an Austin FG K60 and a Morris FG K30 that I’d bought on Trade Me for $705.
The round trip takes the better part of a week, with the story being covered over three Deals on Wheels issues: 255, 256, and 257. Once back home in Auckland, I unload the trucks and park them up because I’m still only half way through restoring my 1953 K Bedford.
Having assessed the two trucks to decide which one will be restored, I decide it’s going to be the smaller one of the two, however, it will be another two years and three months before I actually get around to making a start on the project.
I wasn’t just sitting around contemplating my navel over those 27 months though, as I was asked to do a restoration on a 1942 left-hand-drive International fire truck, and no sooner had that job been completed, I went and bought a 1991 Mitsubishi transporter that needed extensive work as well.
Both of those stories were covered in Deals on Wheels between September 2015 and November 2016.
December 2016
 |
|
The cab completely stripped
|
Not wanting to take too long a break, I got stuck into The FGK Morris, having pulled the little truck out of storage and given it a good old once-over with the water blaster.
I always enjoy getting into a new project where you’re never really too sure which end to start on.
Do you do the hard bits first or ease yourself into the project by taking on something that looks relatively simple and work on from there? In this instance, I decided to take on the easy end first and started off by removing the deck, which did, in fact, come off relatively easily.
The chassis, as I expected, was pretty good, with there only being a bit of rust heave where water had snuck in and settled between the middle cross member and the chassis rails.
Leaving the cab, engine, and gearbox in place to be tackled later, I set about removing the diff and quickly found that all four spring shackles were in need of replacement—a job that was easily remedied by handing my engineer a princely sum of just over a thousand dollars which he probably spent on his first instalment of a new BMW.
Aside from the pain of parting with a thousand bucks so early into the restoration, there wasn’t an awful lot else that caused me any other problems, so I strung the rear end of the truck from the shed roof, as I happily worked my way forward, cleaning and painting as I went.
Once the diff was back in place, it was a simple matter of turning the truck around in the workshop with the intention of working my way back towards the centre of the chassis.
As there wasn’t a lot of head-height in the shed, I had to undo the cab mounts and rock the cab back onto the chassis in order to be able to get at the engine.
Aside from what seemed like a ton of oily caked-on mud in the engine compartment, it looked like there might be a glimmer of hope that the engine might not have to come apart, so I removed the spark plugs and squirted a little bit of light oil down the bores, grabbed a crank handle that looked like it’d almost fit, and to my great glee, the motor turned over freely.
I figured that it was worth trying to start it up before I went ahead and removed the powerplant for cleaning. Long story short, it fired into life after only a few compressions and it ran like a sewing machine.
Feeling pleased about not having to spend any money on the donkey, my pleasure was short-lived, as when it came to removing the front suspension, I could see that my engineers was going to easily make the next instalment on the BMW I spoke of earlier.
Hot on the heels of that second $1K in the engineer’s pocket was yet a similar amount to spend on a new radiator and about the same again on brake and clutch cylinders.
Next came the cab—not a lot of money to spend there, just a truckload of hours. The cab wasn’t in bad nick from floor-level up, aside from a couple of nasty bits on the corners at the bottom of the windscreen, but the underside was a different story.
Years of dust and water had combined to make a haven for rust to grow in every nook and cranny in the cab’s framework, so the only thing to do was to start cutting. Eventually the cutting stopped, and I was able to start rebuilding, a job that was to take a number of months.
It wasn’t until I had the cab back in place that I’d truly given any thought to what was going to go on the back of the chassis. I knew I didn’t need another light truck, as I already had the K Bedford I’d restored earlier, so I thought, how about a tow wagon?
The whole exercise was originally designed to be a bit of an ‘out of my comfort zone’ affair in any case, so that’s what it was going to be—a tow wagon.
After several days of sitting a 2400x1200 sheet of ply alongside the truck and drawing different shapes on it, I finally had in my mind’s eye, a modicum of an idea of the look I wanted to end up with.
January 2018
.jpg) |
|
Bodywork under construction
|
I’d previously built the wooden flat deck on my Bedford, but I didn’t know how I was going to go with fabricating a steel version with shaped sides.
I bought a plasma cutter and experimented with scrap sheet metal until I felt confident enough to go for the doctor with the real McCoy. The next six months were spent at an average of 20 hours a week building the body.
July 2018
 |
|
Straight out of the paint booth
|
The next job was to find a towing rig to go on the deck. It was never going to be more than a showpiece to take to rallies, etc., so any towing rig was going to be for display purposes only, but try as I might I couldn’t find one anywhere.
I did manage to find an old hand-crank winch in Masterton, which I bought and had collected by my mate Murray in his 1931 Bedford when he just ‘happened’ to be in the area. With the winch secured, the next task was to fabricate a boom, which turned out to be yet another step out of my comfort zone.
September 2019
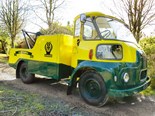
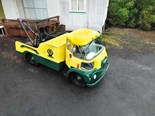
My collection of restored trucks has now grown to three: a 1953 K Bedford, a 1964 FG K30 Morris, and a 1991 FH140 Mitsubishi, which brings me to what’s coming up next month:
1970 D750 Ford restoration—Part 1.
Tip of the month
Never stop restoring old trucks
Read where it all begin on Deals on Wheels NZ
Find more trucks for sale in NZ
Keep up to date in the industry by signing up to Deals on Wheels' free newsletter or liking us on Facebook.


.jpg)

.jpg)