Restoration: Ford D750—Part 12
Deals on Wheels' resident restorer Lyndsay Whittle's updates on his restoration project
Following on from a couple of months of seemingly nothing much happening on the restoration front, we’ve been cracking on at a healthy pace with lots of relatively small jobs coming to fruition all at once.
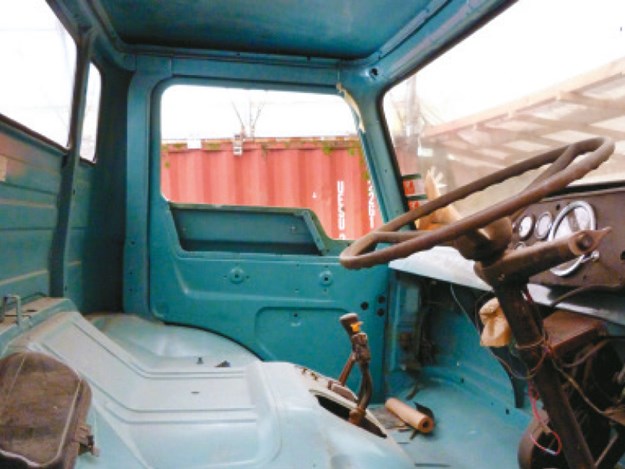
The nearside door that had been causing quite a lot of grief because of all the rust I found in both the inside and outside panels has finally come together, having been painted both sides and is now fitted to the cab, albeit without any of the associated hardware.
I have to admit to making things a little harder by having to paint both surfaces in different colours, however, that pain was eased with the exceptionally kind help of Graeme Blackstock who has been following the restoration’s progress.
.jpg)
Graeme, who runs a D Series and has a heap of parts in his shed, has offered me a pair of quarterlight windows, ending a ‘how on Earth will I find two of these’ moment I had a few weeks ago when I discovered that mine were almost beyond redemption.
He has also come up with some other valuable items that will probably speed up the process by a couple of months, regaining some time I lost during C-19 lockdown and to a certain extent, my own indolence.
The roof of the cab looked like a herd of elephants had walked over it, so it had to be beaten into shape, causing me some headaches in the process.
When I started the restoration nearly a year ago, I noticed that the roof was starting to get surface rust all over it, so the first thing to do was to give it a good sand and rustproof.
In an uncharacteristically smart fashion for me, I made the call to not only prime the surface but to also give it a finish coat given that a primer-only coat does seem to retain quite a bit of moisture over time.
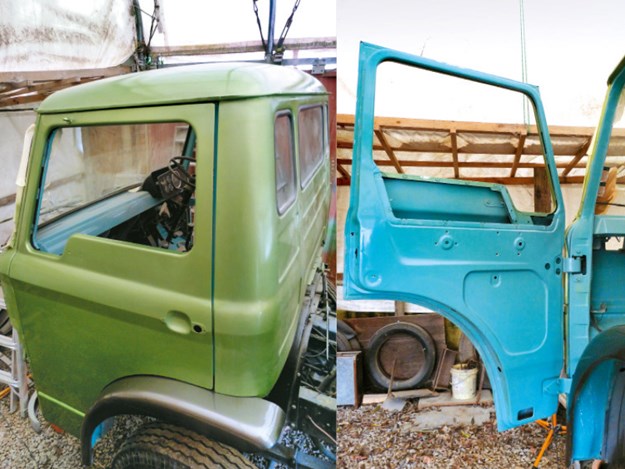
I painted over all of the dents, all of which needed to be beaten out this time round, however, I’d be telling porkies if I told the readers that I didn’t resort to using filler in the few places I couldn’t get at with a hammer and dolly and also the odd dent I couldn’t remove because of a lack of panel beating ability on my part.
But, as it turns out, that initial coat of paint was a good call, given that it probably saved me from having to replace the entire roof because of the deterioration that would’ve occurred in the intervening couple of years before the restoration finally got underway.
I’d fabricated and welded-in new guttering over both doors some months ago, so now that the roof’s done and dusted. It means that we’re getting that little bit closer to having the cab finished, leaving only the mechanicals, the chassis, axles, and tipper body to complete the restoration.
I know it all sounds like a quick and easy fix when you write it in a single paragraph, but we all realise that it’ll keep me busy for a few months.
A minor setback
Just as things were starting to move more quickly in the right direction, old ‘Murphy’ brought one of his laws into play. Let me explain.
A week or two ago while working on the Ford, I’d figured I’d done enough work for the day. I’d just finished putting the final coat of clear on the truck’s roof and was looking around for some other job to occupy the spare hour or so I had up my sleeve before I headed off to an appointment.
I looked across the yard to admire my handiwork and noticed that my poor old K Bedford was looking extremely dusty, as I’d been using it as a platform to carry out the Ford’s roof restoration.
I decided to give the old K a wash, so I went and found the key to fire it up.
A push on the starter button produced a nil result, which meant the battery terminal must’ve come loose.
Sure enough, that was exactly the case, so after a quick tighten-up, I got back in the cab thinking that the old girl was probably packing a sad at having to suffer the indignity of being used as a working platform over the last few weeks.
Now, one would have thought that stupid notion might’ve rung some alarm bells but no, it didn’t.
The old Beddy started with the first push of the button, so it was into gear and start moving out.
However, I felt a slight resistance as I engaged the clutch and then there was a hell of a bang, crash, and clatter and suddenly it dawned on this silly old fool that he’d run a plank in front of the D’s cab from the tray of the K.
The result of this act of incompetence was that while there was zero damage to the K, my nicely-painted D’s front panel was now sporting a few dents that I would now have to repair, not to mention the fact that I’d probably wind up having to repaint the entire front panel.
While I’m still finding it hard to come to terms with just how thick I must be, I’m gaining solace from the fact that at least I’ll get a bit of extra panel and paint experience under my belt.
Even though I do have a few restorations under my belt now, it still never ceases to amaze me as to the number of individual parts that go into completing a motor vehicle.
Moreover, the hours that go into removing a part from the parent vehicle, disassembling that part, cleaning, and painting it before it can be refitted is almost beyond comprehension. I’ll use the accelerator pedal as an example.
Without taking the linkages into consideration, the D’s pedal itself is made up of no less than nine separate parts if you include the mounting nuts bolts and washers, all of which needed to be either cleaned and painted or in some cases replaced.
While the pedal rubber looked fairly tidy, the same couldn’t be said for the metal part of the apparatus.
As there was no way to remove the rust without damaging the rubber, the two bits had to be separated to affect the repair. This was done with a knife cut down as a scraper and a strong solvent to dissolve the glue.
I managed to get the rubber portion off without causing too much damage, after which I was able to clean the unit before setting about putting it all back together again.
While I don’t make a habit of carrying out a time-in-motion study on every part of a restoration, this one was a bit of an eye-opener, as the entire operation took an incredible four hours to complete.
Either I’m slow or it really was a time-consuming task. I’ll leave that one for the readers to decide.
That my friends, is the last time I’m going to do that to myself (and indeed anyone who’s reading about it) for the fear of it putting people off embarking on future restorations.
Anyway, there’s work to be done. Better get back to it.
Keep up to date in the industry by signing up to Deals on Wheels' free newsletter or liking us on Facebook.


.jpg)


.jpg)
.jpg)
.jpg)
.jpg)