Restoration: Dodge — Part 17
Following on from last month’s instalment, thankfully, we were able to get enough brakes to move the truck under cover, although, things didn’t turn out quite the way we planned
 |
|
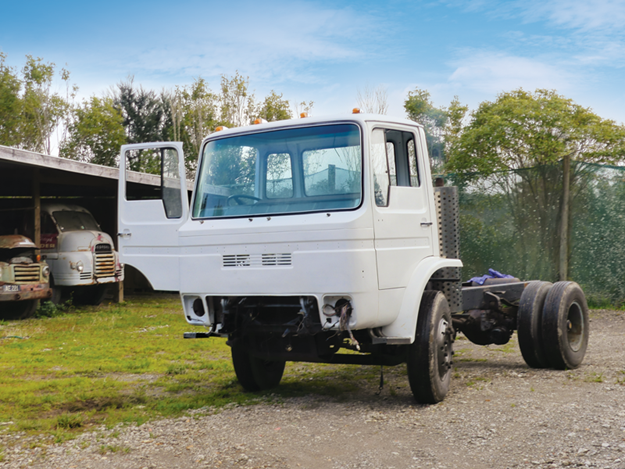
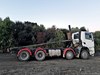
Free at last and on its way to a new location
|
The idea was to move the truck away from the uncovered concrete pad in front of the workshop to a storage space adjacent to it. Having unstuck the rear brakes (more about that later), it was time to fire the old girl up and drive it into a more ‘comfortable’ place.
Had things gone the way we’d planned, the truck would’ve been close enough to all the tools and power points even though there wouldn’t be a nice flat concrete surface to work on.
I’d figured it out that when the odd occasion arose, I’d be able to drive the rig out onto the concrete when (or should I say if) we had a fine day — fat chance of that.
Unexpected hurdles
 |
|
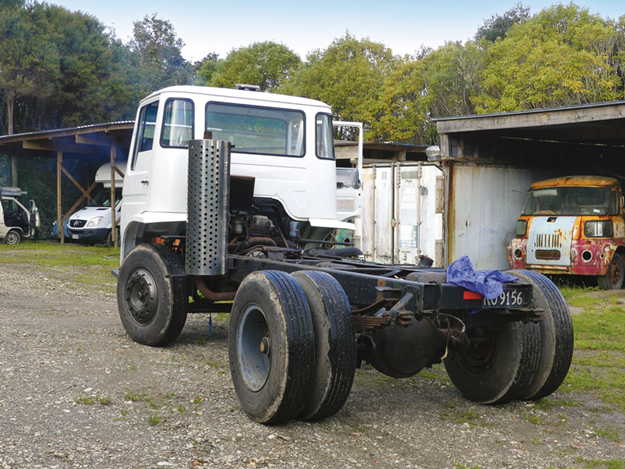
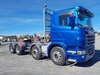
The truck’s last day out in the weather
|
Anyway, I digress. A space had been cleared between two 20-foot containers, and I reckoned that we might just squeeze the Dodge under the bar that holds the canvas arch in place, so it was then time to fire up the engine prior to the move.
That should’ve been an easy manoeuvre, as I’d only spent that last week or so getting the air-assisted clutch working, and as said earlier, the brakes were now unlocked, plus, we already knew the motor was in fine working order.
We were all set to go, so with the engine started, brakes released, and reverse gear effortlessly selected, we were up and running — err, crawling. At this point in time, there was still no accelerator fitted, so we were relying purely on a fast idle.
Everything appeared to be going fine until I went to drive under that bar that was mentioned earlier when my mate Murray put up his hand and yelled out "Stop!"
 |
|
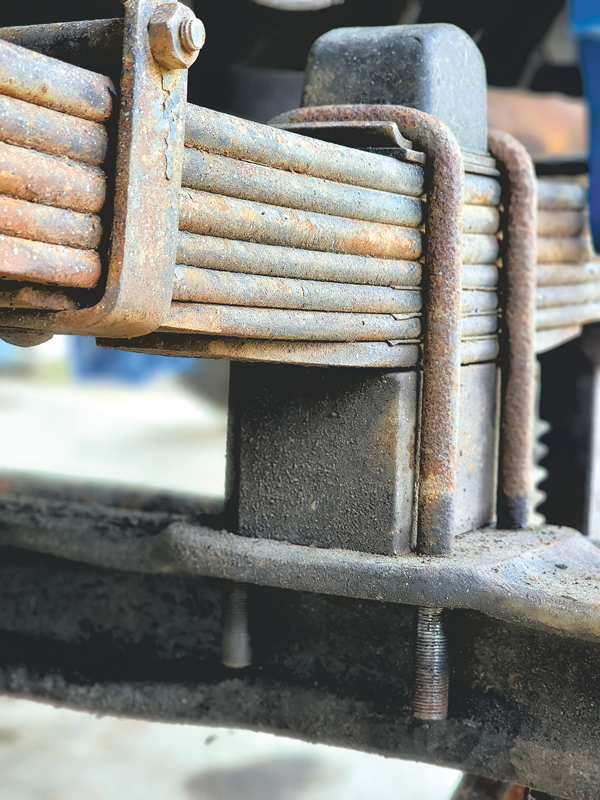
The 100mm block before removal several months ago
|
It appeared that the truck was taller by an inch or so, even if we removed the marker lights and flashing beacon from the roof. That was a bad calculation, as early into the project, I’d already reduced the height of the truck by about 100mm when we reconfigured the suspension to its original specification.
A shift in strategy
 |
|
We thought by lowering the front springs, the truck would fit in the shed — wrong!
|
With Plan A down the dunny, I had to relocate the truck to a shed about 50 metres away from the workshop, which is not ideal, but at least it gives the truck a bit of a run when I want to work on it outside.
At least it’s under cover at last — a giant leap forward especially as it’s still raining cats and dogs. As said at the beginning of this story, there’s more to tell, so no better time than now, I guess.
I talk a lot about the people who work behind the scenes to move each of my projects along — people whose help I could never do without. One such guy is a man I’ve spoken
of before — Noel Galloway in Woodville. Regular readers will remember that he’s the one who sourced the donor cab for me a few months back.
While Noel’s not a qualified mechanic, it’s fair to say that he knows his way around both ends of a spanner. He has to really, because he still tools a truck and a digger most days, even though he’s 80, and as for his collection of vintage and classic trucks, well there’s
a sight to behold.
I was telling Noel about a problem I was having with the RG13’s diff being locked up and about the way it made this horrible metal-to-metal clunk when you tried moving the truck either backwards or forwards.
We talked for a bit about how it didn’t sound or feel like the brakes were jamming. I’ve had that problem many times over the years with the likes of Bedfords and Austins, which simply won’t move, in which there was never any ‘clunking’ involved.
Noel suggested I give Ben Pacon a call down in Palmerston North, saying that Ben began his apprenticeship with the local Todd Motors dealership back in 1979 and that if anyone knew how to diagnose a problem like that, it’d be Ben.
Expert advice
 |
|
Keep an eye out next month for an update on the window
|
I didn’t waste any time getting in touch with the man himself. Ben listened patiently to me prattling on before suggesting that I should remove the backing plates and give the drums
a whack.
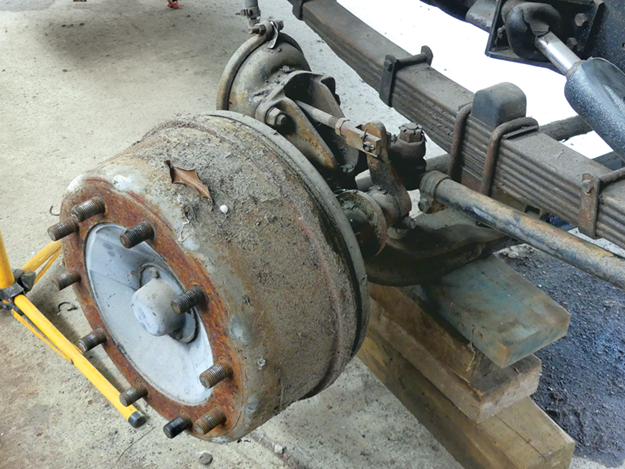
‘Yeah right’ I thought to myself. Firstly, those backing plates looked like they’d be a nightmare to remove, and secondly, it couldn’t be seized shoes, could it? After all, that clunk in the diff sounded metallic, not brake shoes on the drum.
Nevertheless, after I’d stopped whining and started listening, Ben explained that the backing plates would come apart in two segments on each side, courtesy of three six-millimetre set screws apiece.
It’s worth mentioning here that these trucks are put together with a combination of bolts with metric threads and cap sizes, which I have to say is a real pain in the neck at times.
Anyway, instead of taking half the afternoon to remove the backing plates, as I’d thought, the entire job took about 10 minutes. While the left brakes released relatively easily, the right ones took a little more coaxing but eventually came free as well.
Needless to say, I was back on the phone straight away, thanking Ben profusely for his excellent advice. While Ben’s patience in getting me to finally listen to his advice had paid handsome dividends, I’m now left with the carnage created by removing a whole lot of stuff that was working properly before the event — stuff that will need to be sorted once I come back from a couple of weeks in the sun in Cairns.
Find new and used heavy machinery for sale in NZ
Keep up to date in the industry by signing up to Deals on Wheels' free newsletter or liking us on Facebook.


.jpg)
.jpg)
.png)
.gif)
.gif)
.gif)
.gif)