Restoration: RG13 Dodge—Part 2
Lyndsay Whittle gives an update on his latest restoration project
 |
|
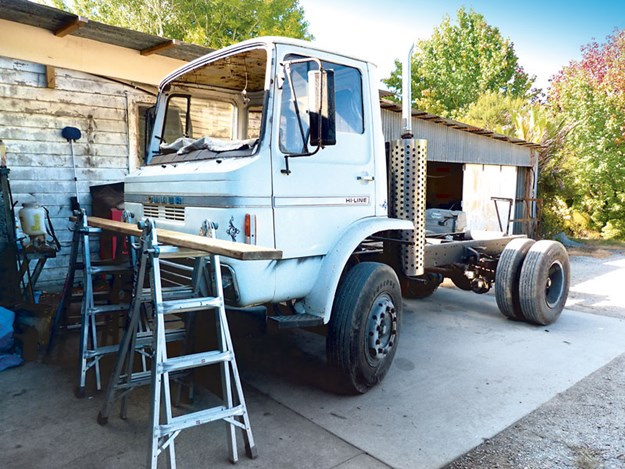
Rust spots don’t seem to show up in this photo
|
With several Bedfords of various shapes sitting undercover waiting to be the subject of the next restoration, it was a bit of a tough call for me to place the Dodge ahead of them in the queue, especially for someone who would generally be considered to be a Bedford nut.
However as explained in Part 1 of this story in last month’s issue, I’d come across the Dodge at a time when I was unsuccessfully searching around to see if the RG11 that I bought new in 1980 was still in existence.
.jpg) |
|
The RG11 (G1190) I bought new in 1980
|
A decent bloke called Simon who had this truck for sale, cut me a good deal for the purchase on the proviso that I gave him updates on its progress throughout the restoration process.
I guess he figured that a series of articles in a magazine that’s distributed New Zealand-wide would be even better, so that my friends, is the reason the Dodge has usurped the Bedfords on this occasion.
 |
|
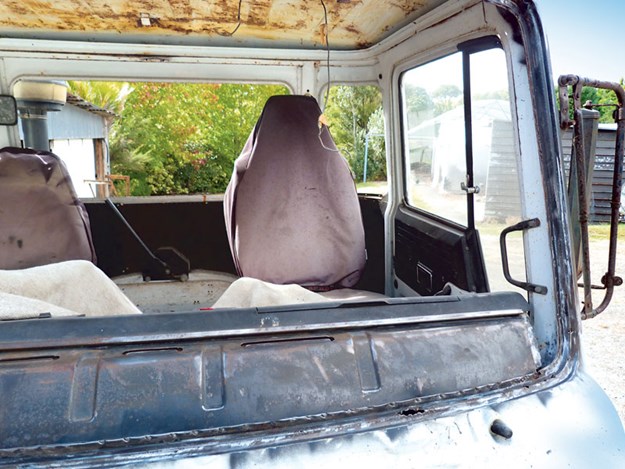
The cab clean up begins
|
Setting priorities: There are three parts of the restoration process that I like best, namely, coming to the end of a restoration, making a decision on what’s going to be next, and finally getting started on the newest do-up.
Given that the first two elements of the process had been taken care of, it was only a matter of where to start with what for me is restoration number six.
I’d already given myself a head start with this one, when back in October 2020 I had removed a deck that was tied onto the truck, where it looked like someone had prior plans to use it in some way or another as part of the Dodge’s restoration.
As I couldn’t see any use for the deck anywhere in my plans, I sent it off for scrap. I mentioned in Part 1, when I first saw the truck in the flesh, it was disappointingly shorter that I’d expected, which at first made me think I wouldn’t be interested in it.
But after a few moments contemplating the matter, I came to the conclusion that its shortness was more of an advantage than it was a negative. Thinking further, I could see the truck being turned into a tractor unit to tow a semi-trailer to be used for transporting my previous restorations to shows or whatever.
 |
|
Rust holes where the four marker lights sat
|
At this stage of the game, I’ve absolutely no idea if this is achievable or not, but it sure is a good place to start. Before we can even begin to contemplate the truck’s final usage, we’ll have to attend to the basics, things like getting rid of serious rust that will surely be lurking under the copious amount of visible surface rust.
Unfortunately for me, the photos I took of the truck before I started dismantling the unit don’t really show the level of surface rust present. To that end, the truck from some angles looks like it doesn’t need any work at all.
But we had to start somewhere, so I organised for my glass man Jeremy Tagg from Bespoke Auto Glass to come out and remove the front and rear screens.
I know that many readers will question my reasoning for having someone else take glass out for me, and I can almost hear people thinking how on earth is this dude going to get on with the more difficult stuff, when he can’t do something as simple as glass removal?
Anyone who has followed my previous restorations will know that the answer to that question lies in the fact that I’m clumsy and being as windscreens and curved rear glass for 1982 Dodges isn’t easily come by these days, I figured I would leave removal and refitting of glass to the professionals.
 |
|
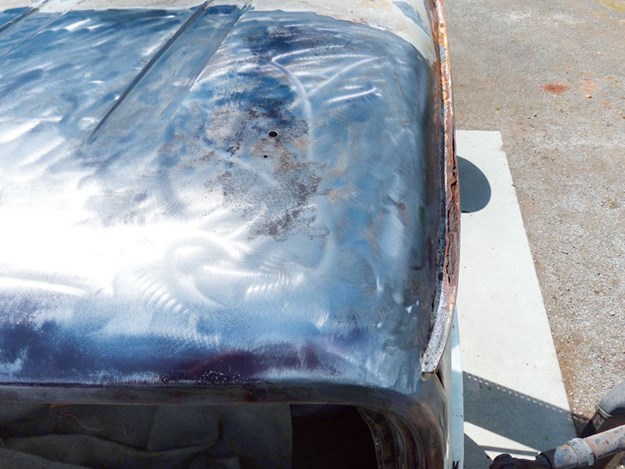
The roof back to bare metal
|
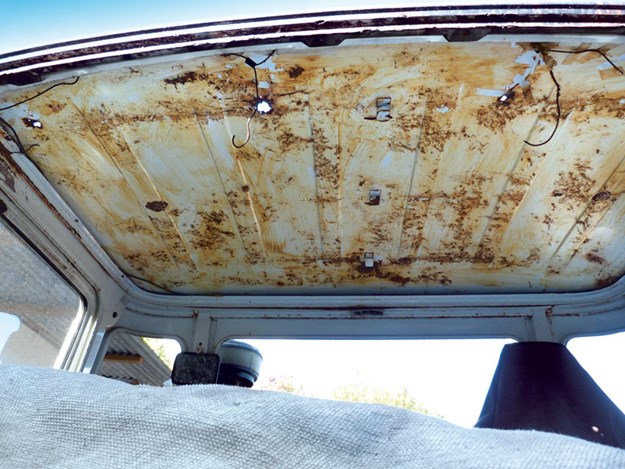
Although I had Jeremy deal to the breakable stuff, I did however trust myself to remove an ugly orange revolving beacon and the orange marker lights from the roof, along with the headlining.
Sadly, one of the most (perhaps the most) pristine part of the truck was the headlining, but typical of my luck it couldn’t be taken out without ruining it, however I’ll leave worrying about its replacement until later.
 |
|
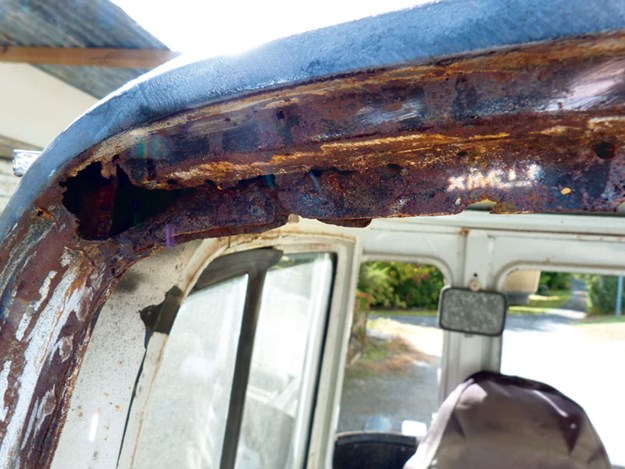
The worse rust was around the windscreen
|
Once these components had been taken out, we could then get an unhindered look at the state of the roof, which strangely enough wasn’t in too bad a condition, save a few rust holes that had appeared under the marker lights, along with around 20 holes of varying sizes under where the windscreen rubber sits.
 |
|
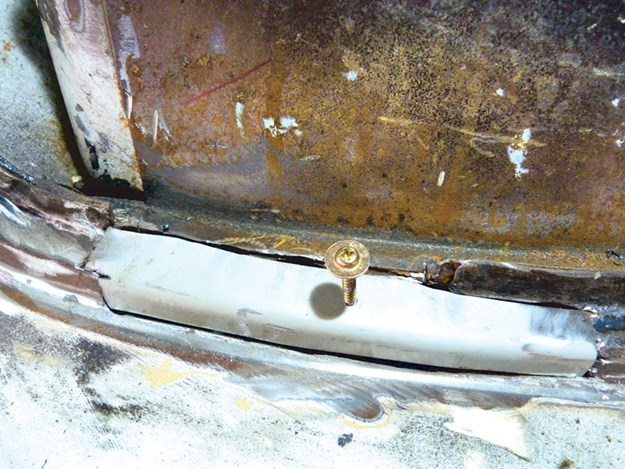
A patch made for the lower winscreen panel
|
The majority of these holes were quite small, with the biggest ones being about the size you could stick a ballpoint pen in, however, there were another four or five that needed to be cut out and patched.
Some of the larger patches needed to be either stretched or shrunk, which gave me the opportunity of re-aquatinting myself with the stretcher-shrinker machine.
I’d be lying if I said that I didn’t have to make one or two ‘prototypes’ before suitably- shaped pieces of sheet metal would match the hole they were meant to fit in.
With the smaller holes it was simply a matter of patiently zapping them with the mig welder, a laborious task, but a whole lot better than an alternative method often used in order to speed-up the restoration process.
I could easily have chosen the latter method of ‘fixing’ the problem with filler, and nobody would ever have known – except me, that is. While I was at it, I spent a bit of extra time replacing some parts of the channel that wouldn’t have held the windscreen rubber in place as well as it might have.
I could’ve probably left it as it was, felt like I needed to get some extra welding practice in. Fortunately, the rear window frames revealed a far happier picture once the glass was removed, as all they’re going to need, is to have some sealant removed prior to priming and top-coating.
Unlike the previous restoration, the D Series Ford, with the exception of one place, the Dodge’s gutters will only need a good old sanding, which is a relief as the D’s gutters were a nightmare to repair.
So, all-in-all we’re off to a flying start, however bitter experience has taught me not to become too complacent when things are going well because often bad things lie in waiting.
Find new and used heavy machinery for sale in NZ
Keep up to date in the industry by signing up to Deals on Wheels' free newsletter or liking us on Facebook.


.jpg)


.jpg)


.jpg)
.jpg)
.jpg)
.jpg)
.jpg)