Restoration: Ford D750—Part 14
After signing off on Part 13 last month, I had a sinking feeling as I realised I'd made a fairly hefty statement when I said that the cab part should be pretty much done and dusted in Part 14.
At the time I made that outlandish statement, the deadline for the next issue seemed like a lifetime away.
Now, having somewhere in the region of 90 restoration stories under my belt to date, one would’ve thought that I should have it etched into my thick head that a mere four weeks separates any current article from the one that follows. Well, obviously that wasn’t the case.
All that needed to be done was to paint the door window frames and fit the glass; finish the panel work on the fluted panel on the front; reshape, weld, and paint the bumper; get the seats back from the upholsterers and fit them; fit out the rest of the interior of the cab; and install the heater. Phew!
 |
|
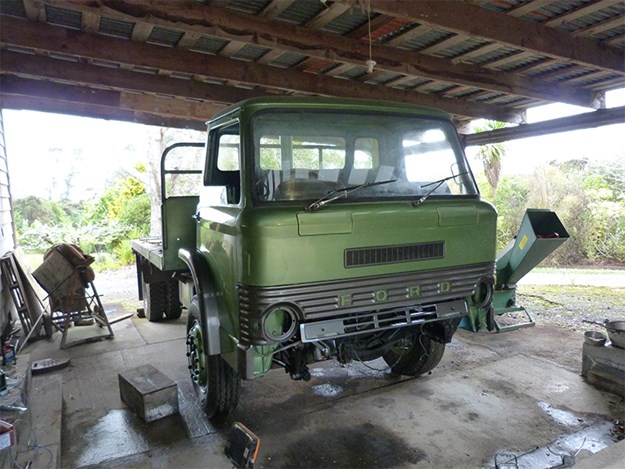
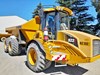
As promised, the cab is near to completion
|
And if all those things weren’t enough, the underside of the cab had to be sanded and have the remainder of the painting completed.
I hope I’ll be forgiven if I deliberately didn’t include floor mats and headlining in the list, as I think it’s entirely reasonable to leave those items until after the inspectors at the testing station have had a chance to cast their eyes over the raw finished product just in case they think I’m trying to hide something I don’t want them to see.
Well, some way or another, it looks like I’ve lived up to my promise, as the cab section is pretty much completed with the exception of fitting the door windows.
These would have been completed as well if it wasn’t for the recent incident on Auckland Harbour Bridge, which caused major delays in getting from one side of the city for the better part of a week.
Jeremy, my glass man from Bespoke Auto Glass, usually has an hour’s trip each way to get from his workshop to mine, thus he generally has to plan his visits to coincide with other jobs he has in my area.
With the partial closure of the Harbour Bridge, we had to accept that the several trips needed to bring this part of the job to fruition were not financially viable from either of us, therefore, this part of the job will have to wait until next month’s issue to be told
in full.
That little hiccup aside, I’m reasonably happy that we’re moving in the right direction.
There are still a few cab items that need to be attended to, such as finding and fitting heater ducting and the final fit-off of floor coverings and head-lining, along with fitting the rear vision mirrors, lights, and indicators.
.jpg) |
|
A bit of work has gone in since the cab looked like this
|
The next stage will be to deal with the chassis section from the back of the cab through to the front of the rear axle.
Once that’s completed, the area from the diff to the rear of the truck will be the focus of attention.
Somewhere in between, we’ll be attending to the leaking exhaust system and finding out the reason for why the two-speed diff isn’t working.
What I’m alluding to here is the fact that the restoration job that I initially thought would only take nine to 12 months to complete is obviously going to take around 20 months.
Having said that, I thought it might be interesting to take a look back in time at this stage to see where we were actually at in timeframes of three months from when we started back in July last year.
The initial task was to start tidying things up in the engine department, so after a good old water blast, sanding, and bead blasting, painting a myriad of components was the order of the day.
By October 2019, most of the glass had been removed from the cab and the interior was stripped-out.
Three months rolls around pretty quickly and by the time January 2020 was upon us, I’d gathered a few useable parts from a derelict later model D from up the road.
I’d also discovered—much to my chagrin—that the rust under the steps was far worse than I’d originally thought it was, so I started remedying the problem on the left-hand side.
By the time April had come around and another three months had passed, it was now time to pay attention to the driver’s side step, which, it’s fair to say, wasn’t as bad as the near-side was, but nevertheless was still a bit of a mission.
.jpg) |
|
How it looked in September 2020, sporting a bright shiny underside
|
I had also managed to perform some rust repairs to the front panel and to get a coat of finish paint on; this provided our first look at what the finished colour of the truck would look like.
Come July, things were starting to come together, and I turned my attention to the doors where once again, the left door was in far worse condition rust-wise than its counterpart.
In fact, the only instance where the left of the truck was in better condition than the right was a skirt about 150mm x150mm that sits under the fluted front panel.
In this case, the left one was not only intact but was also pretty much rust- and dent-free, whereas the one on the right was missing completely.
Well, here we are, and yet another three months has almost disappeared into history, but thanks to Graeme Blackstock in New Plymouth who has been following this story right from the start, I’ve been able to source many parts that would’ve otherwise been difficult, and in some cases, nigh on impossible to come by.
Because of Graeme’s extensive stock of D Series bits and pieces, along with his generosity in being prepared to share them, I’ve been spared many sleepless nights wondering where on Earth am I going to find that authentic part that will return this classic old truck to its former glory. Thanks heaps Graeme. Your help is really appreciated.
Keep up to date in the industry by signing up to Deals on Wheels' free newsletter or liking us on Facebook.


.jpg)

.jpg)
.jpg)
.jpg)
.jpg)