Restoration project: D-Series Ford—Part 6
Taking stock of how far along we are with this current restoration it became apparent that I’d been dragging the chain somewhat over the last couple of months, with the Christmas break providing me with a modicum of an excuse I suppose for the lack of progress.
 |
|
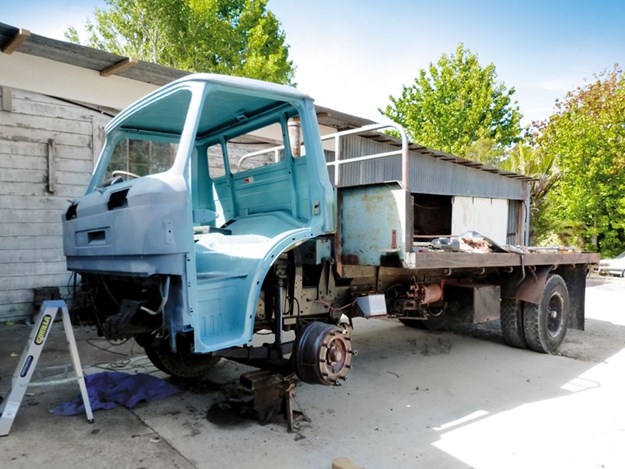
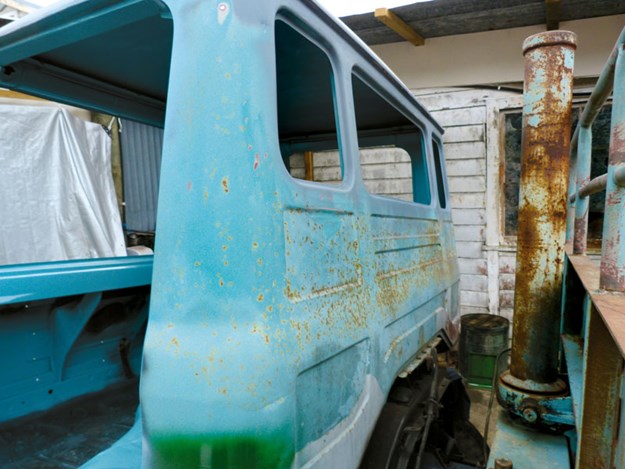
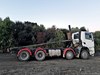
Sitting in the same position as last month but with a little more paint
|
However, we all know that excuses no matter how plausible don’t get things done, therefore the only thing to do was to pull finger and try to make up for lost time by tackling a job that I’d kept putting off.
Removing paint from large surfaces has never been (and probably will never be) a pleasurable experience in my book, nonetheless the time had now arrived when I couldn’t put it off any longer and the paper overalls had to be donned and a start made.
It would appear that there’s no such thing as a perfect situation, as while the beautiful warm weather we’ve been experiencing recently has given me fewer days being rained off the job, it by the same token has made it most uncomfortable to be wearing overalls, hence the reluctance to make a start on this most unpalatable part of the process.
One of the problems I have is that the truck is too tall to fit in our workshop, so a kind of Heath-Robinson tarpaulin outfit attached to the shed at one end and the headboard of the truck at the other has had to be erected.
While on the upside, the setup works well enough in keeping any moisture out, the downside is that the cover has to be removed before work can start and replaced at the end of the day.
As I’ve said in previous articles, the truck appears to have been well looked after in its previous life, having been professionally rust proofed from new, an advantage that has obviously been aided by a life of being shed-stored, coupled with a fairly robust servicing regime.
That being said, a farm truck is never going to get away without the odd scrape and dent here and there, especially when the truck has spent around fifty years in the marketplace.
Often, the most expedient way of effecting a repair is to panel beat the ding as best as can be done without removing half the cab panels and body-fill the rest.
While I take my hat off to the previous repairers, as body filler has been used to an absolute minimum, it nonetheless is going to create a bit more work for me further down the track.
You see, paint-stripping discs (at least ones I’m operating) don’t seem to be able to detect the difference between a steel substrate and body filler lying beneath the old paint being removed.
 |
|
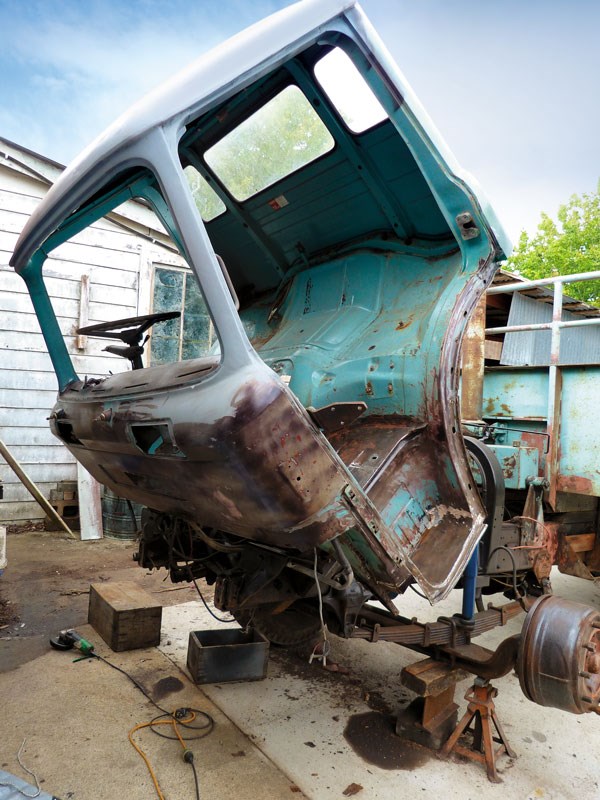
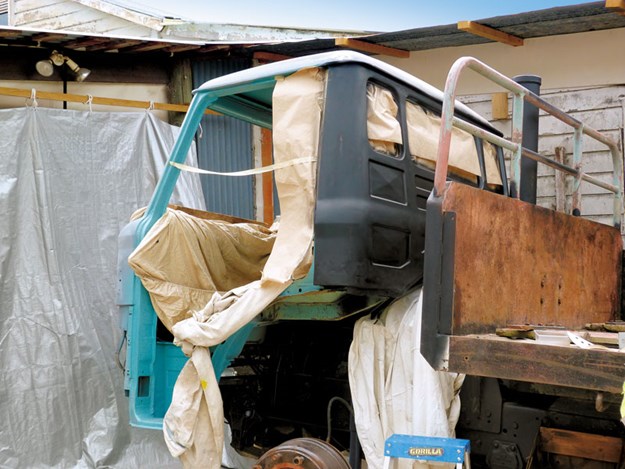
Everything is now stripped out
|
It’s not the end of the world though, as it’ll now give me the opportunity of removing the remaining filler and have a go at repairing some of the panel-work that the previous guys would’ve been unable to properly access with all the panels in place, so I might as well make good of the opportunity while the cab is completely stripped down I guess.
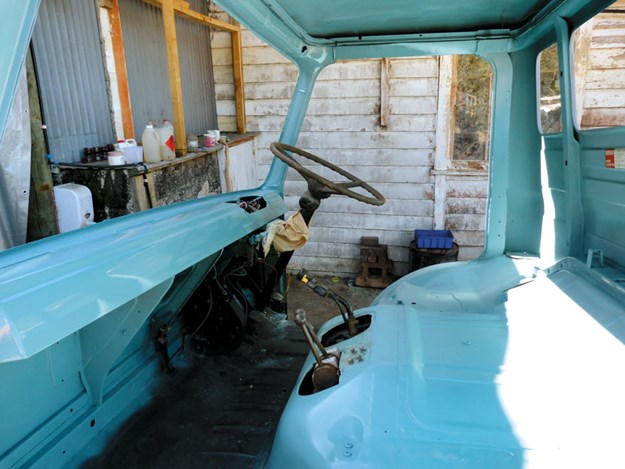
While it’s never been said that I’m one to make great decisions, one good call that I made recently (at least I think it was a good one) was to retain the original paint colour, for the inside of the cab at least.
 |
|
Original inside colour
|
I have to say that that light blue isn’t one of my favourite colours, but I figured that I should keep a part of the truck’s original features alive. If I’m completely honest though, I think the decision was made more out of laziness than it was anything else because about 80 percent of the interior paint was in reasonably good nick, not perfect but at least good enough to keep.
Besides which, much of the floor and under the seats isn’t seen either, because of the seats and floor coverings. Therefore, the best solution was to get a litre of paint made to a colour match, which made it possible to paint the bits that really needed to be redone while allowing the rest of the paintwork to more or less seamlessly blend in.
When it comes to painting the underside of the cab, the obvious thing to do would be to use the same colour for that part of the job as well, which I think should enhance the authenticity of the rest of the finished product.
Recently I’ve been reflecting on how different my approach has been to tackling each of the four restorations I’ve done to date. Prior to having carried out a vehicle restoration (I was a very late starter) I would’ve imagined that all restorations would be tackled in much the same sequence, with the only variations being any specific damage incurred by each individual vehicle, such as rust in different places or replacing specific parts as required.
 |
|
There is very little rust in the cab
|
Perhaps the difference in methodology has come about as a result of the experience I’ve gained along the way, rather than the needs of the job at hand, but I’m not really sure.
One quirk of this current job has been the fact that I’ve found myself refitting parts to the truck that were only removed and cleaned, ready for replacement, as little as a few days ago.
It feels kind of strange because with all four of my previous restorations, parts would probably sit in storage in some cases for up to six months before the area of the vehicle they came from would be ready for a final fit-out.
As an instance, it was my intention this time round to get the front and rear windows back in place as quickly as possible in order to make the cab reasonably water tight, however recent progress has seen to it that I can now get the rest of the cab’s exterior painted and have the glass fitted in time for next month’s instalment.
 |
|
Perhaps a matt black exterior might be the go?
|
I’ve run out of room to tell the story this month, but I had a visit a few days ago from a man who knows more about D Series Fords than I’m ever likely to know, the upshot of this is magically, I’ve wound up with a fifth gear in the gearbox, and I don’t have to perform any feats of mechanical engineering to achieve it – I’ll tell all in next month’s instalment.
Tip of the month
Listen to other people, they probably know more than you do.
FGK Morris update
At last, the truck has been certified by VTNZ, however there is still one hoop to jump through, and that is to try to get a hub odometer exemption from NZTA.
The reason for wanting the exemption is because a hub meter would spoil the overall look of the truck, due to the factory-fit hubcaps.
Find more trucks for sale in NZ
Keep up to date in the industry by signing up to Deals on Wheels' free newsletter or liking us on Facebook.


.jpg)

.jpg)