Restoration project: D750 Ford—Part 2
When I start out on a new restoration project, I like to give a back story as to how I came by the vehicle in the first place
However, I ran out of space in the introduction story, so please let me paint a picture.
Unlike the FGK Morris that’s been the centre of attention over the past three years—a vehicle that had to be collected from the South Island, taking me just short of a week to get it home—the D Series should’ve only taken a couple of hours at the most.
 |
|
Making a start
|
The distance to get the D to its new place of residence was 25km, or a mere one percent of the travel distance for the Morris recovery, so one could have reasonably assumed that there would’ve only been scope for one percent of the problems in carrying out the recovery of the vehicle.
I’m not playing down the problems encountered on the SI trip, as there were plenty of those, but I’m here to tell you that the D Series trip home made the trip back from south of Ashburton pale into insignificance.
I could write pages on everything that went wrong, but let’s just say it started with the truck being filled with diesel instead of petrol, and then everything went downhill from there. There I was, in the middle of winter with a stranded truck on the side of the road.
For anyone interested in knowing more, the Ford’s recovery has been featured in our editor Randolph Covich’s book Life on the Road, and the South Island saga was recorded in an earlier three-part series in Deals on Wheels.
Anyway, the truck wound up in my possession on around May 2016 when it was promptly placed undercover until I could make a start on getting it roadworthy again.
It has been driven out on odd occasions over the past three years and has been put on display once or twice a year at car club events, which are often held on my mate Murray’s property.
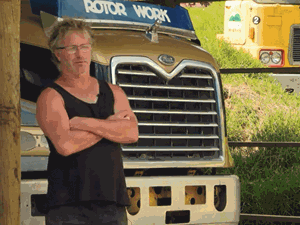
The funniest thing about this restoration is the diverse range of comments I get from people when they hear I’m restoring a D Series Ford.
 |
|
Before
|
The reactions range from "why would you bother" to "what a neat truck". Even I often ask myself why I’m doing this; after all, I’m a Bedford kind of bloke, but I guess the bottom line for me is that some fool has to save these old icons of the road from the scrap man.
In reality, this one was pretty much intact when I came by it and I have to admit that the design of the D Series with its tilt cab was way ahead if its time, even if you do have to push down on the gear lever and turn it 180 degrees before you can tilt the cab without annihilating the two-speed switch and the gear lever knob.
Speaking of the relatively complete state of the truck, I was telling my old mate Chris Freeth of Trash Control fame about my latest restoration venture, and he said he knew where to find quite a few D Series parts.
When I told him I probably wouldn’t be needing too much in the way of parts, his first comment was: "It’s not really a restoration then, is it?"
I suppose he has a point and I’m happy to have the discussion, but my argument is that the truck wasn’t road legal when it came into my possession, and it will be by the time I’m finished with it.
In any event, I’d be interested to hear what the readers think. Anyhow, enough of the pontification, I suppose I’d better get on with justifying the space that I’m taking up on this page and start talking about progress to date.
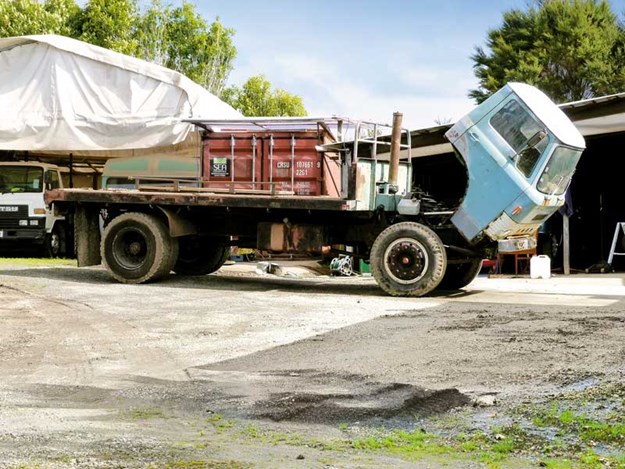
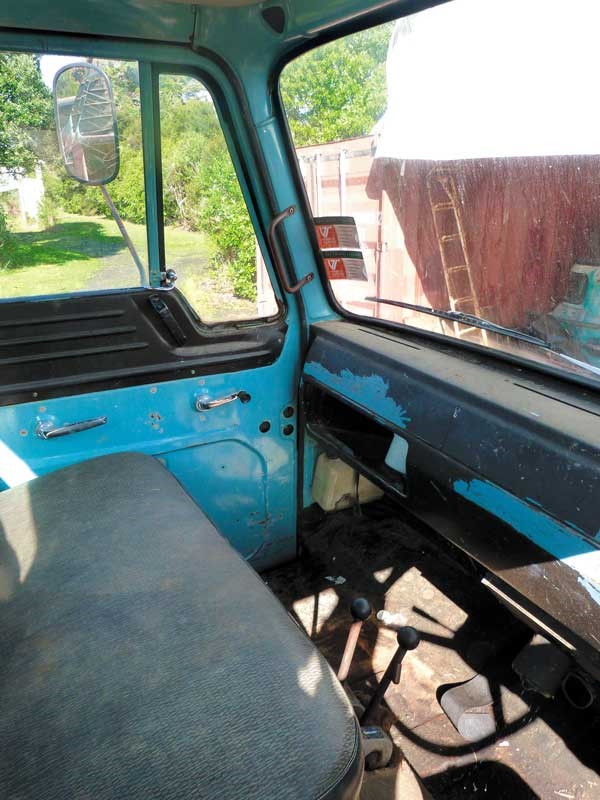
As explained in Part 1 last month, I was going to start with the easy stuff at the back of the truck and work my way forward, however, a quick look at the roof of the cab revealed that the surface rust thereon needed to be dealt with in double-quick time, so a front-to-back restoration it was going to be.
 |
|
Roof protective coat in place
|
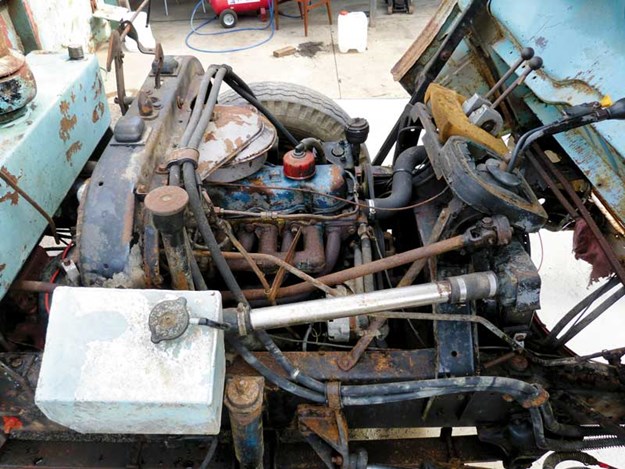
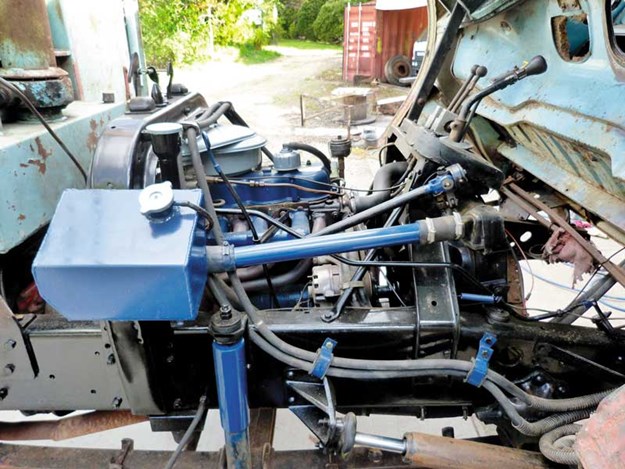
Given that the engine and transmission were in good order, or so I thought (more about that in Part 3 next month), I’d decided to dispense with any idea of removing the powerplant and contenting myself with a good-old tidy-up under the cab.
I quickly found out that getting at the engine compartment wasn’t going to be a happening-thing without removing the crossmember, which secures the back of the cab, so off it had to come.
Before I could get at the crossmember I needed to remove the spat guards, which turned out to be a relatively simple operation.
The left spat came off first, and much to my chagrin, despite looking fairly tidy, it had almost rusted through where it was secured to the two brackets, so long story short, it took slow-old-me a couple of days to fabricate and weld-in the new bits.
The good news, however, was that the one on the right-hand side was almost like new, only going to prove the old adage ‘you win some, you lose some’.
Oh, before I go, I was looking back at last month’s article and I saw the photo of the spare wheel with the caption that read ‘story for next month’.
 |
|
After
|
Well that blasted wheel turned out to be a stark reminder to a nearly 70-year-old that perhaps it wasn’t such a good idea after all to be messing around with trucks fitted with 900x20 tyres.
With the exception of the 1942 International fire appliance, if did up for Titirangi Volunteer Fire Brigade, which had 750x20 tyres, the three other recent restorations I’ve done were all on 16-inch rims, all of which I can still handle with relative ease.
The hand-winch that lifts and lowers the spare wheel was minus its handle, so the only thing to do was to hold the wheel up with a floor jack while I undid the two securing nuts, then lower it to the ground and quickly pull the jack from underneath.
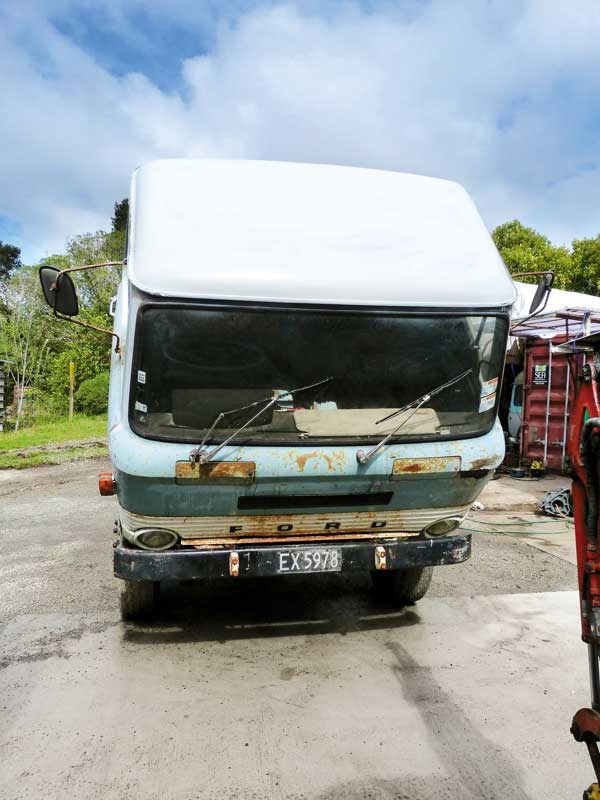
 |
|
Ready for windscreen removal
|
The operation went smoothly until I went to lift the wheel to be put aside for cleaning at a later date. I’d forgotten how heavy those puppies are, and if I hadn’t already been well underway with this restoration, I think I’d have given up there and then.
However, as they say, the show must go on and I’d better get back to restoration, so until next month.
Oh, by the way, there’s still some unfinished business with that last job—the FGK Morris.
It’s finally been seen by the heavy vehicle inspector, who says I need to have some chassis welding carried out by a certified welder. I’ll include an update next month as well.
Tip of the month
Know your limits
Coming up...
Some mechanical work required and an FGK Morris update
Keep up to date in the industry by signing up to Deals on Wheels' free newsletter or liking us on Facebook.

.jpg)


.jpg)


.jpg)