FGK Morris Restoration—Part 20
Here we are at Part 20, but it only seems like a few months since Lyndsay undid the first few nuts and bolts to get the restoration underway
By my reckoning, we’re around about three-quarters of the way along our journey, so I thought it would be timely to take a look back at what we started with 20 months ago and to look at where we’d progressed to exactly a year ago.
Aside from covering what has taken place in the last month since Part 19 went to print,
I thought we might peek into the future and see what needs to be done to get the job finished. So here we go.
The saga begins
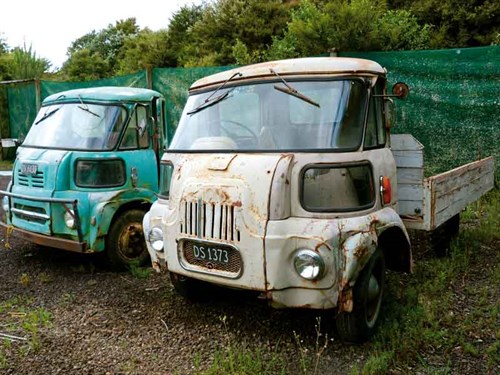
Where we were at 12 months ago
While the whole saga actually began back in 2015 when I purchased two trucks—a six-cylinder Austin and a four-cylinder Morris from the tiny town of Albury in the South Island, the story of which is told in Deals on Wheels Issues 255/256 in February/March 2015—I didn’t really start the restoration until almost two years later after I’d finished the previous restoration of my 1991 Mitsubishi transporter.
Originally, it was a toss-up as to which truck would be restored—the FG K30 or the larger FG K60. However, in the cold light of day, when I’d unloaded the two trucks from the transporter after about three days on the road getting them back to Auckland, it was patently obvious that the smaller truck would be the easier restoration option.
When I say "easier option", for me at least, there haven’t been too many patches when I’ve found the going ‘easy’, at least from a bodybuilding point of view.

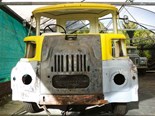
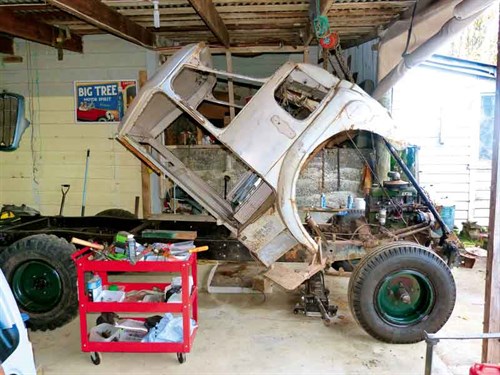
The donor truck being gradually denuded
I was never worried about the mechanical side of things, as that is familiar territory for me, but when it came to unpicking, then replacing rusted framework, along with designing and building the body on the back, I found myself a little out of my depth at times.
The next chapter
I’m approaching the next step in the operation with a degree of trepidation, too, which is designing and manufacturing the towing rig that will go on the back. But as with anything, one only has to ask someone with the knowledge and all of the information needed to complete the job at hand.
I must break away from the story of the restoration for a moment to tell of an interesting trait of human nature: spare parts and information seem to be more easily obtained when there is no monetary transaction involved.
I make this bold statement because on the numerous occasions I’ve asked for help with finding a bit of obscure info or obtaining various bits and bobs from the public, help in one form or another has usually appeared like magic. Whereas, often when I’ve approached businesses who presumably hope to make money from trading their wares, many either take ages to get back to me or some don’t bother to follow up on my request at all. Anyway, back to the story.
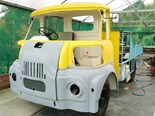
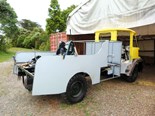
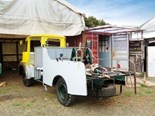
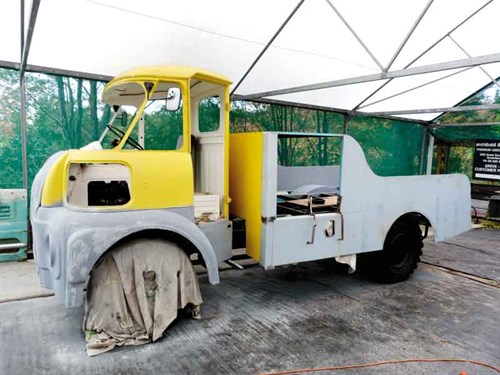
Having made relatively slow progress over the past couple of months—explained in the previous two issues, plausible as my excuses were, I might add—we’ve had a good month this time around with progress being made not only with the prep work on the front wings but also with fitting the inner and outer panels to the body.
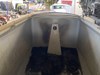
The next step I’m currently working on is getting the wooden deck fitted, which will allow me to make headway with fitting the previously-prepared hand winch, which needs to be in place before I can think about starting on designing and manufacturing the towing rig.
Small wins
One little bit of a win I’ve had since last month’s instalment has been with the finishing of the top edge of the sides of the body. I mentioned last month that I was having trouble locating an aluminium moulding that was the exact width of the combined size of the framework with a panel of 1mm panel either side of it.
Although I’d previously visited a moulding supplier and had been told there wasn’t a product available to suit my specific needs, undeterred, a couple of weeks later, I got hold of a short length of scrap steel framing and riveted a piece of panel to either side to use as a sample.
On this trip back to the supplier, I spoke to someone who knew a thing or two, and this time, I walked out with two lengths of a product that were exactly the right size and shape to do the job nicely.
I’ve fitted the moulding and at one stage had thought I might leave the aluminium unpainted and use it as a feature. However, I’ve since discovered that it needs to be screwed at 100mm centres, which makes it look a bit too chunky for my liking, so I’m now considering using small rivets and painting the top edge in the same colour as the rest of the body. I haven’t decided definitely at this stage, but then I find I always have to have something to ponder before the next instalment.
Other jobs on the horizon
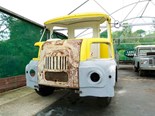
I know I’ve been promising myself for a few months that I’ll get the glass fitted, but there’s still a bit of painting to do before that can happen.
And before I do the painting, I’ve got my mate Murray onto the laborious task of filling in a few small hollows with spot putty, so hopefully, we should have the windscreen, the two foot-level windows, and the rear screen fitted sometime early in July.
Another job I’m not relishing is replacing the metal frames for the quarter light windows. However, this could wind up being a job for the professionals, but I’m at least going to give it a try making them myself before I resort to the more drastic course of calling on professional help. But that my friends will be a story for another issue.
Coming up...
Hopefully, the woodwork will be completed
Tip of the month:
Don’t be afraid to call on professional help
Keep up to date in the industry by signing up to Deals on Wheels' free newsletter or liking us on Facebook.