Restoration project: FGK Morris—Part 16
Being March already, Lyndsay finds himself scratching his head as to why he's not further along with this restoration than he'd hoped for
The situation isn’t helped at all by the fact that my wife Christine keeps taking me away from the task at hand by whisking me off on holidays to South Australia and to our wonderful South Island.
With the excuses about my poor performance restoration-wise out of the way, I suppose I’d better get down to talking about the few jobs I have been able to cross off the list. One job that has been pending is the fitting of the windscreen and rear window, which was booked in for December last year.
Fitting of the windscreen and rear window
Jeremy Tagg from Bespoke Auto Glass is an old mate of mine who did a great job of making and fitting all the glass to my K Bedford, and I wouldn’t think of using anyone else for my classic vehicle’s glazing requirements.
However, poor old Jeremy had an operation performed to one of his wrists—a situation that has put him out of action for a couple of months and left me with some pretty big holes in my FGK Morris.
I noticed while reading my ‘coming up next month’ segment in last month’s issue that I was going to report on how the glass fitting job went this time round, but unfortunately, we will have to wait until April to find out.
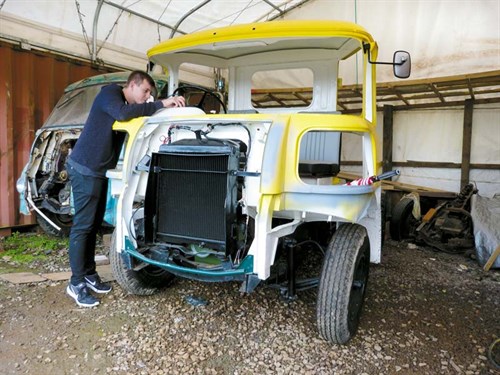
Fitting the wings
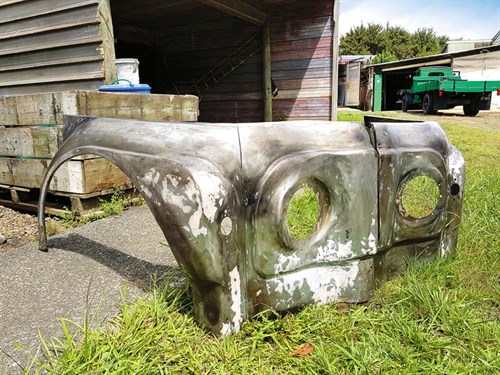
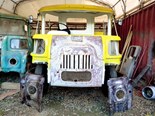
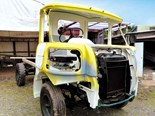
I’ve had the front wings back from the panel beater for a couple of months now, so any excuses on my part for not cracking on with them are well past their use-by date. I’d made a start by fitting the wings up to the cab and found that due to all the hammering, poking, and prodding they’ve endured over the years, coupled with the fact that the corner pieces under the lower windows needed surgery, there were gaps that, in places, needed a bit of a helping hand.
The gaps were repaired courtesy of two to three millimetres of body filler to make the two surfaces look straight and tidy. I have no idea why the manufactures never made allowances for any discrepancies in this area by fitting fender welt between the two surfaces, which was a fairly standard practice of the day.
I’ve endeavoured to keep this restoration as sympathetic to the original specifications as I possibly could, and if it didn’t originally have fender welt, I wasn’t going to fit any, even if fitting it would’ve made the job a lot tidier and it would stay looking pristine for a lot longer as well.
I somehow knew that my decision to stick with originality was going to cost me valuable time in fitting and undoing this part of the process, and I wasn’t wrong. I must admit that I have a bit of a problem with starting on a particular part of a job and sticking with the programme, which is probably why I have a couple of projects on the go at any given time.
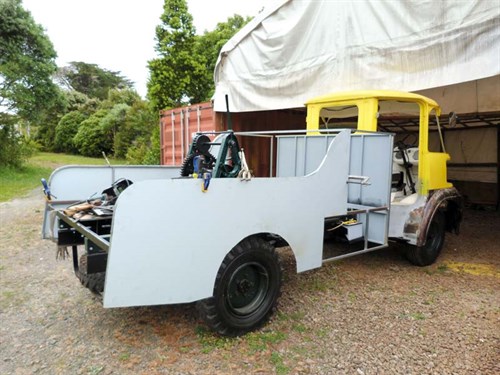
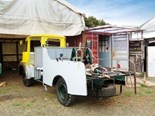
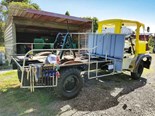
Every time I was frustrated with the front end of the truck, I’d turn my attention to the rear section. After all, they are both parts of the restoration that need to be tackled. The bodywork that will eventually encase the towing rig (the rig’s another job I’m not looking forward to) provides me with a little light relief from fitting and unfitting wngs and allows me to let what few creative juices I have to flow.
It’s been a lot of fun playing around with different designs, and I’ve finally come up with one that I’m happy with. This has also given me a chance to play with my fancy new $400 plasma cutter.
But as with the fitting of the wings, which although frustrating at times has had its interesting moments, the rear end is about to become a little bit boring (in the literal sense) when I start on drilling about 10,000 holes (a slight exaggeration) to rivet the panels to the framework.
Gluing vs. riveting
Now, I know a few of you are going to wonder why I didn’t glue the panels on instead of riveting the things. The simple answer is that just like the fender welt I mentioned earlier, it simply wouldn’t look in period without rivets.
The fact of the matter is that I will be gluing the panels because I’ll wind up with a stronger job; the rivets are just for effect.
Whenever I get tired of fitting front wings and drilling holes for rivets, there are other little tasks that need to be attended to, such as finishing off the mechanical brake linkages that are attached to the hydraulic bisector cylinders that operate the handbrake.
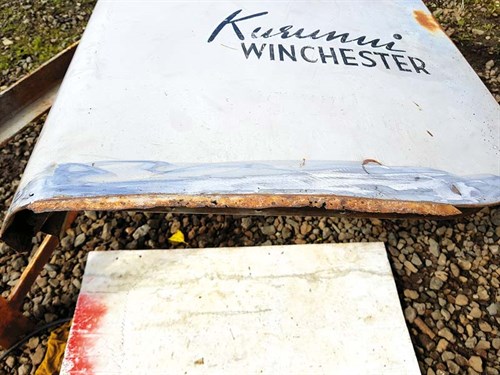
There is also a front bumper that needs to be manufactured from a bumper I have off a larger Morris truck of the era and the doors are going to require a bit of work in dealing with a small amount of rust on the underside of both.
These had a weird riveted panel steel plate on the bottom with a rubber seal attached and were badly rusted to the point where I couldn’t see the detail in which they were manufactured back in the 1960s.
However, I think I’ve come up with a simpler way of putting these together, which won’t be original but I reckon will do the same job. This all goes to prove that even my penchant for originality goes out the window when it applies to something you’re not going to see. Quite obviously, I’m not as pearly white as I pretend to be.
Before signing off, I mustn’t forget to mention the great work my auto sparky Areo Litherland has done on getting all the electrics working properly. Well done, my friend!
Tip of the month
Be prepared to relax your standards when it doesn’t really matter
Coming up
Will Jeremy recover from surgery to fit the windscreen?
Keep up to date in the industry by signing up to Deals on Wheels' free newsletter or liking us on Facebook.

.jpg)


.jpg)

.jpg)
.jpg)